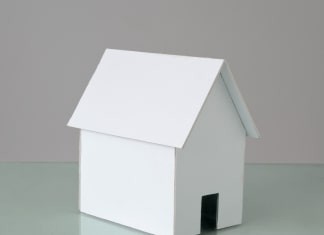
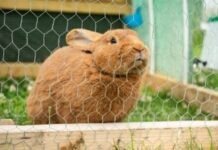
Like a great house pet, a rabbit is very popular in millions. It’s a fun thing to see them around your home running, jumping, and playing. We know that you want the best accommodation for your little pet. Rabbits are so active animal that wants to live their life in free-range. While you’re wondering about the ideal housing for your rabbit, make sure it provides ample space for movement and is a safe hideout with exits, litter box, water, and food. A rabbit cardboard house can satisfy all these criteria that every rabbit owner wants for their furry pet.
Here we are going to show you how to make a fun, DIY cardboard rabbit house. Just stay tuned to the end.
If you ever observe rabbits, you’ll notice a common occurrence in them of digging, nibbling, and chewing anything suitable to their teeth. Apart from their temperament and propensity to play, this tendency leads them to target the cardboards in the house. Though cardboard is not their food replacement, rabbits count it as toys. They munch, chew, and bite it which is good for the growth of their teeth. And, also, doing this gives them enjoyment while you leave your pet isolated in its’ cage. So, the cardboard bunny castle can be an amazing place for this lovely pet to enjoy his or her playtime.
Making of a cardboard rabbit house
As there aren’t a large variety of toys for rabbits, so they can get bored easily while you leave your little pets alone in their living place. While buying one rabbit cardboard castle can be a bit expensive, making one by you is far more innovative as well as reasonable. So, let’s find out what different you can do using cardboards. As they don’t eat tape or glue, we’ll use twine to bind the cardboard pieces together.
The things you’ll need-
- One roll of jute twine
- 2 big cardboard boxes
- Marker
- Pencil
- Self-healing board
- X-acto knife or boxcutter
- Scissor
- Washable glue
- Duct tape
Now follow the below steps-
- At first, sketch your desired design of the rabbit house. It’s very important to decide the size of the bunny cardboard castle. 12 square feet is the minimum area that your little pet should be confined in. Your design should allow the rabbit to access the whole space. And, keep an additional exercise place so that it can move freely between the exercise and living space.
- Where to locate the cardboard house? Well, there is no perfect point for placing it, but you can keep it under the place alcove or stairs. Remember that it won’t fit well through the doorway. Make sure it isn’t covering any plug socket that you often need to use.
- Chewing is the rabbit’s favorite task, but you can’t let it get the teeth into whatever there is in your home. So make sure, the cardboards that you are going to use are free from any hazardous element like tape. As the tape is made of plastic, if ingested, it can be harmful to the rabbits.
- Just to avoid any kind of misconception, mark all the boxes indicating each side.
- Now draw the castle design on the cardboard. The length and width of the windows and doors depend on how tall and wide your rabbit is. Make a line where you want to create the second door on the cardboard.
- Now it’s time to cut the design according to the shapes with an x-acto knife. You should do it sitting on a self-healing mat; otherwise, you can cut whatever there is beneath the cardboard.
- Cut through the boxes to get flat pieces of boards. Cut out the unnecessary flaps of the cardboards and the 2nd-floor platform. To support the cardboard piece, keep a 1″ slab on all the sides. In the corner of the boards, cut off a square shape through which the rabbits can jump.
- While it’s about the second-floor layout of the cardboard bunny castle, make sure the platform is enough strong. To ensure strengthen, you can use 2 pieces of board-layers on the top. Mark out the hole-points.
- Now penetrate the marked holes by putting twine string in them. For comparatively sturdy, you may need much time to do this step. A tweezer can be helpful during this time-consuming step.
- You have to be very careful while creating the slabs. You need to keep it intact, not to cut off all the way. Cut the slabs in a way that you can fold the boards.
- It’s time to put the 2nd floor of the castle up in the sketched-line. Place it according to the holes on the slab of the main castle. After matching up, start to string twine through the holes.
- To match up the side and top holes together, use a glue gun. Compress a border of glue around the edges of the boxes as well as holes. With this step, both the edges will stick upright with each other. To ensure stickiness, hold them together for a few seconds.
- Keep in mind that you also need to apply glue to stick the inner edges with the outer holes of the box together.
- Based on how well you stick the holes and boxes together with glue, this step goes on. After attaching the cardboards all together, you need to make the borders of the holes smooth. So, place duct tape to smoother the margins of the holes so no skin-cut occurs. This step also provides support to the boxes.
- As you cut off the base of the box, so there won’t be any floor. And, cut off 4 small holes on the top through which you can pass 2 pieces of twine. Using a simple knot, tie the upper side of the box. Ensure that you can release the knot whenever requires.
- If you want, you can create some additional designs for this bunny castle. Cut twine into the same size of the castle’s window and door. Apply glue on the windows as well as the door and place the twine pieces on them.
- Now the exciting part of the process. Watching your little pet going inside the castle that you made for it with your own hands is just worth your effort and time. After all these steps, finally, it’s time to let the rabbit check it out if it fits well.
If you want to keep your furry friend’s brain sharp, you can also put some DIY bunny toys in the cardboard rabbit house. Let’s find what interesting things you can add to your bunny’s castle-
- To make the rabbits enjoy their destructive side, you can fill one side of the house with crinkled tissue paper. Your small pet will love to digging around and tear it up.
- To give your bunny a simple toy, cut out two small accesses on opposite sides and poke holes with a carpet knife or scissors. Place your rabbit’s favorite treat or hay in socks and make several small holes into them. Now hang the socks inside of the cardboard house by pushing them through the top holes. Your rabbit will enjoy getting the stuff out of the socks.
- If you’ve several empty tissue paper boxes or toilet paper rolls at home, just cut the upper side of the boxes using a scissor. If necessary adjust the sides of the rolls or boxes. Stuff the boxes or rolls snugly with paper rolls. Make sure that they won’t frequently fall apart. You can add a few dry treats to this simple toy. But, remember, if you observe that your small pet starts to eat the boxes, better carry away it.
- Take strips of fabric and jute strings and cut them into short lengths. Make holes in the cardboard house and place the stuff through the holes and tie a knot on both sides. Your bunny will love to pull the pieces of stuff, dig and chew as well.
- Dice up an emptied toilet paper roll in the shape of each 0.5″ ring. To bring out the shape of a ball, arrange the pieces as criss-cross style into each other. You can place a treat at the center of it. Let your adorable pet find out how to bring out the treat.
Cardboard rabbit house is a great playing place for your cuddly, fluffy, and adorable little pet. Particularly for those pet owners who don’t have much indoor place, a DIY cardboard castle filled with simple DIY toys can give pleasure and entertainment to this great pet. As the rabbit is a notorious chewer pet, you’ll observe that it sinks its teeth into any stuff of your home. But as cardboards contain a mixture of lignins (plant cell tissues), cellulose (plant fiber), and water; chewing cardboard is not harmful to rabbits. Plain cardboards are non-toxic, so it doesn’t affect your little pets’ digest system. You can surely let rabbits play and enjoy in a cardboard castle.


